
개요
테스트 코드가 통과해야만 API 명세서를 생성해주는 Spring Rest Docs 를 로컬에서 적용하고, 생성된 API 명세서 결과 파일(html)을 Github Actions 을 이용해서 Github Pages 로 정적 배포하는 과정을 정리했다.
테스트 코드를 한번도 작성해본 경험이 없어서 테스트 코드에 대한 개념도 없고, Spring Rest Docs 의 작동 방식을 완전히 이해하고 작성한 것은 아니다.
복잡했던 삽질의 과정을 머리가 아닌 글로 정리해서 기억하고자 작성했다.
작업 환경
- OS: MacOS
- Java: 17.0.6
- Spring Boot: 3.2.3
- Spring Cloud AWS Starter S3: 3.0.0
- Gradle: 8.5
- JUnit5
Spring Rest Docs 설정
이 글은 테스트 코드를 한번도 작성하지 않은 프로젝트 환경을 전제로 한다.
build.gradle
공식 문서(링크)에서 안내하는 부분을 먼저 설정한다.
1
2
3
4
5
6
7
8
9
10
11
12
13
14
15
16
17
18
19
20
21
22
23
24
25
26
27
28
29
30
31
32
33
plugins {
	// (1)
	id "org.asciidoctor.jvm.convert" version "3.3.2"
}

configurations {
	// (2)
	asciidoctorExt
}

dependencies {
	// (3)
	asciidoctorExt 'org.springframework.restdocs:spring-restdocs-asciidoctor:{project-version}'
	// (4)
	testImplementation 'org.springframework.restdocs:spring-restdocs-mockmvc:{project-version}'
}

ext {
	// (5)
	snippetsDir = file('build/generated-snippets')
}

test {
	// (6)
	outputs.dir snippetsDir
}

asciidoctor { // (7)
	inputs.dir snippetsDir // (8)
	configurations 'asciidoctorExt' // (9)
	dependsOn test // (10)
}
1번부터 10번 항목 중에서 일부만 간단하게 살펴보자.
dependencies
1
2
3
4
5
6
dependencies {
	// (3)
	asciidoctorExt 'org.springframework.restdocs:spring-restdocs-asciidoctor:{project-version}'
	// (4)
	testImplementation 'org.springframework.restdocs:spring-restdocs-mockmvc:{project-version}'
}
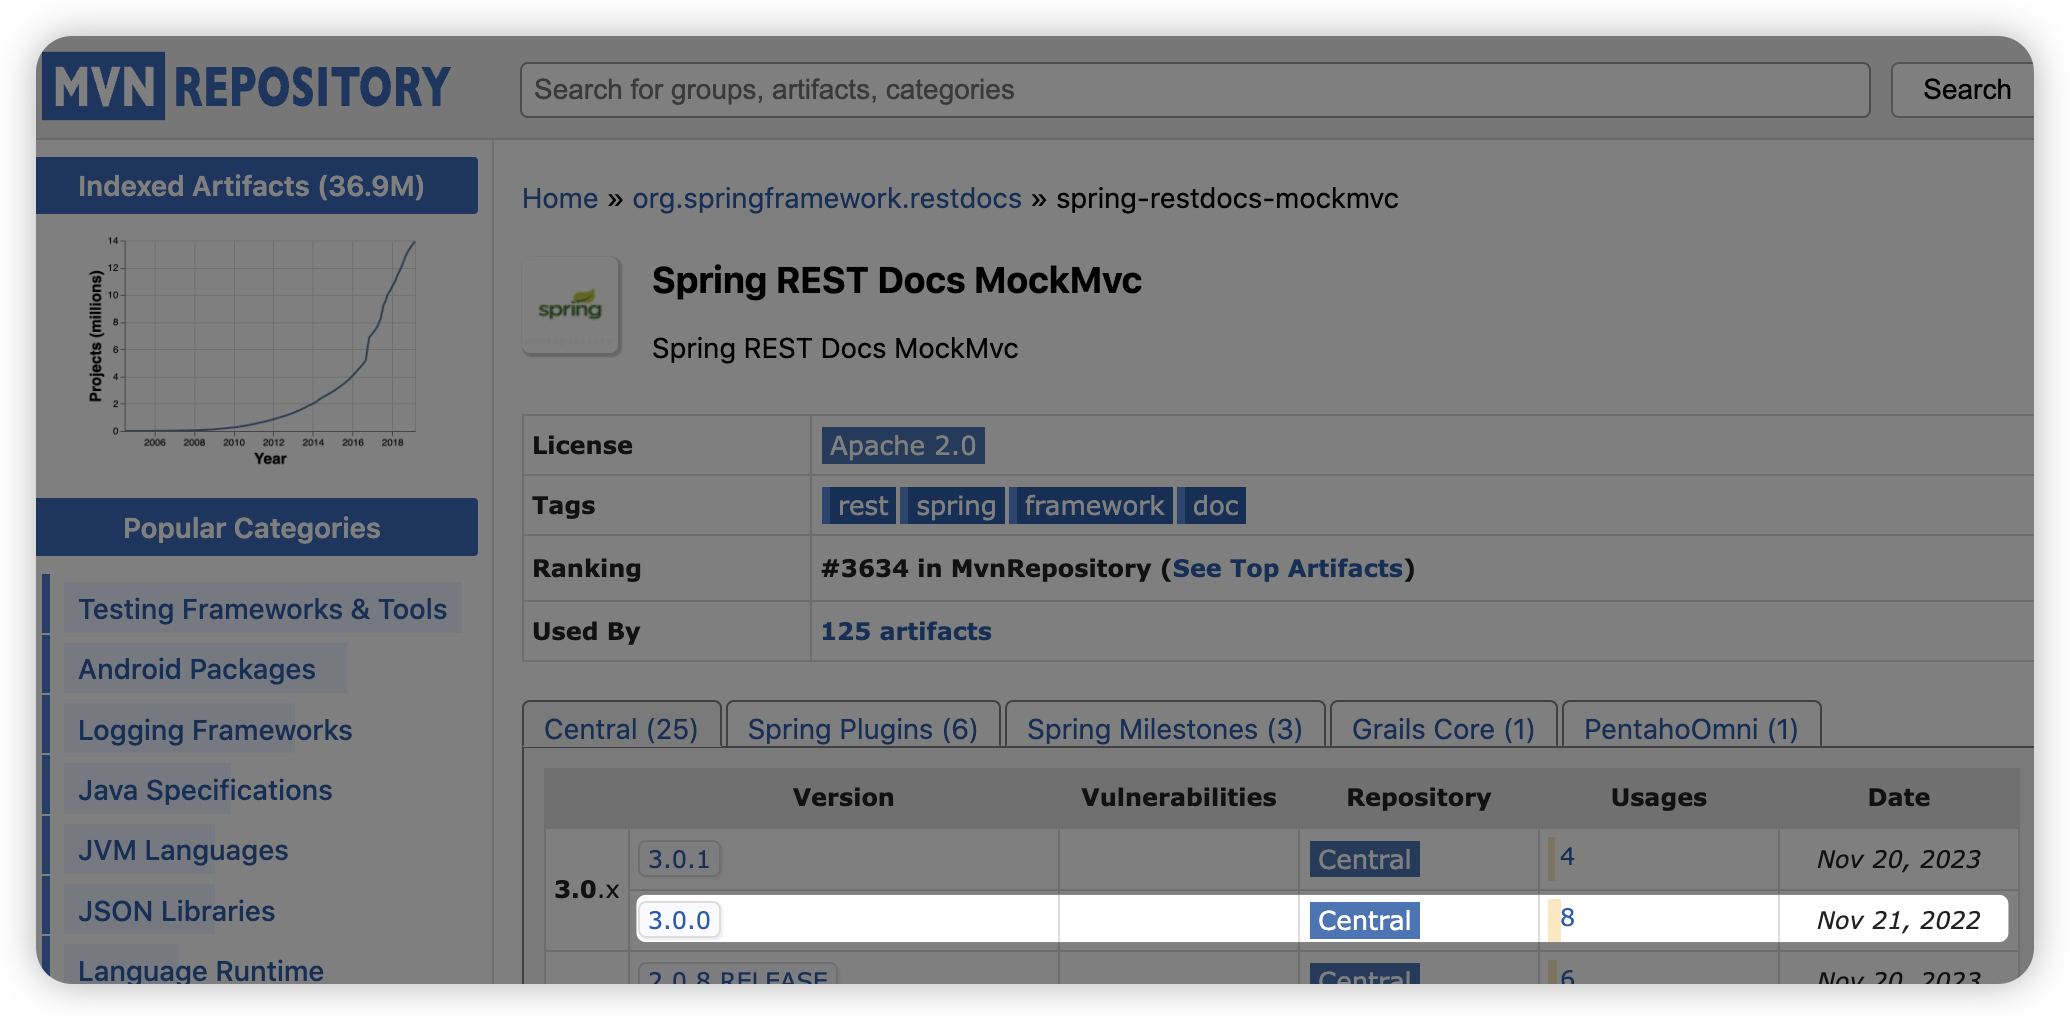
3번과 4번에 버전을 명시하는 {project-version} 은 maven repository 를 참고해서 작성했다.
2024년 7월 기준으로 3.0.1 버전이 최신 버전이지만, 최신 버전보다는 이전 버전이 조금 더 안정적이라는 생각이 들어서 3.0.0 버전을 사용했다.
ext
1
2
3
4
ext {
	// (5)
	snippetsDir = file('build/generated-snippets')
}
5번 항목은 프로젝트를 빌드할 때 생성할 API 명세서에 포함될 스니펫(http-request, http-response 코드 조각 등)을 build/generated-snipets 에 생성한다는 의미이다.
API 명세서를 생성하기 위해 아래의 명령어를 실행하는데, build 폴더에 재사용 가능한 공통 코드 조각(스니펫)이 생성된다.
1
./gradlew asciidoctor

curl-request.adoc 파일 내용은 아래와 같다.
1
2
3
4
[source,bash]
----
$ curl 'http://localhost:8080/restDocs' -i -X GET
----
build/generated-snippets 하위 폴더에 생성되는 이 파일들은 테스트 코드마다 공통으로 사용할 코드들이라는 것만 인지하면 된다.
추가 설정
JUnit 을 이용해서 테스트 코드를 실행할 것이기 때문에 아래와 같이 useJUnitPlatform() 을 추가한다.
1
2
3
4
test {
    useJUnitPlatform() // 추가
    outputs.dir snippetsDir
}
Github Pages 로 배포했을 때 adoc 파일들의 경로를 제대로 찾지 못하는 오류(Unresolved directive in index.adoc - include::)를 해결하기 위해 baseDirFollowsSourceFile() 를 추가한다.
1
2
3
4
5
6
asciidoctor {
    inputs.dir snippetsDir
    configurations 'asciidoctorExt'
    dependsOn test
    baseDirFollowsSourceFile() // 추가
}
adoc 파일 생성
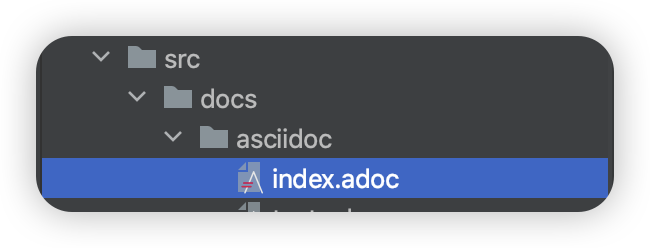
공식 문서(링크)에 따르면 gradle 은 src/docs/asciidoc 경로에 위치한 *.adoc 파일을 바탕으로 html 파일을 생성한다고 한다.

아래의 사진과 같이 src/docs/asciidoc 디렉토리를 생성하고, index.adoc 파일을 생성한다.
index.adoc 파일은 아래와 같이 작성했다.
1
2
3
4
5
6
7
8
= HabitPay API
:doctype: book
:source-highlighter: highlightjs
:toc: left
:toclevels: 2
:seclinks:

include::test.adoc[]
간단하게 문법 설명을 하면 아래와 같다.
=: H1 태그와 동일하다. H2 는==, H3 는===로 작성한다.include::test.adoc[]:index.adoc파일과 동일한 경로에 있는test.adoc파일을 포함한다. 이 파일에 대해서는 이 글의 아래에서 테스트 코드 작성과 함께 설명할 것이다.
Spring 테스트 환경 구성
여기서부터는 테스트 코드와 관련한 부분이다.
h2 데이터베이스 의존성 추가
Spring Boot 는 별도의 설정이 없다면 기본으로 데이터베이스를 h2 와 연결한다.
테스트 코드를 실행할 때도 데이터베이스에 연결하는데, 테스트 코드에서는 실제 운영하는 DB 가 아닌 임시로 만든 DB 를 사용할 것이다.
build.gradle 파일에 아래와 같이 h2 데이터베이스 의존성을 추가했다.
1
2
3
4
dependencies {
		...
    testImplementation 'com.h2database:h2'
}
테스트 실행할 때만 사용할 것이기 때문에 testImplementation 으로 작성했다.
application.yaml 파일 생성
DB 설정
앞에서 설정한 h2 데이터베이스와 연결을 위해 아래와 같이 작성했다.
1
2
3
4
5
6
7
8
9
10
11
12
13
spring:
  h2:
    console:
      enabled: true
  jpa:
    database: h2
    hibernate:
      ddl-auto: create
  datasource:
    driver-class-name: org.h2.Driver
    url: jdbc:h2:mem:test;MODE=PostgreSQL;
    username: sa
    password:
Github Actions 를 이용해서 빌드할 때는 h2 의 client 모드를 이용할 수 없어서 인메모리 모드인 jdbc:h2:mem 으로 작성했다.
AWS 설정 (선택)
main 폴더에 작성한 코드에서는 AWS S3 를 이용하는 코드가 있다.
테스트 코드 실행 시에는 실제로 사용하는 액세스 키와 시크릿 키를 main 에서 실행할 때와 같이 작성하지 않아도 가짜 값을 적어도 상관없다.
S3 버킷 이름도 존재하지 않는 임의의 값을 설정했다.
1
2
3
4
5
6
7
8
9
10
11
12
spring:
  cloud:
    aws:
      s3:
        bucket: hello
      stack:
        auto: false
      region:
        static: ap-northeast-2
      credentials:
        access-key: hello
        secret-key: world
spring security oauth 설정 (선택)
구글 OAuth 로그인 기능을 이용하고 있었기 때문에 이와 관련한 속성도 정의했다.
물론 이 값들도 실제 사용하는 값이 아닌 가짜 값을 작성해도 상관없다.
1
2
3
4
5
6
7
8
9
10
spring:
  security:
    oauth2:
      client:
        registration:
          google:
            client-id: ${GOOGLE_CLIENT_ID}
            client-secret: ${GOOGLE_CLIENT_SECRET}
            redirect-uri: ${GOOGLE_REDIRECT_URI}
            scope: ${GOOGLE_SCOPE}
전체 코드
전체 코드는 아래와 같이 작성했다.
1
2
3
4
5
6
7
8
9
10
11
12
13
14
15
16
17
18
19
20
21
22
23
24
25
26
27
28
29
30
31
32
33
34
35
36
37
38
39
40
41
42
spring:
  config:
    activate:
      on-profile: test
---
spring:
  h2:
    console:
      enabled: true
  jpa:
    database: h2
    hibernate:
      ddl-auto: create
  datasource:
    driver-class-name: org.h2.Driver
    url: jdbc:h2:mem:test;MODE=PostgreSQL;
    username: sa
    password:
---
spring:
  cloud:
    aws:
      s3:
        bucket: hello
      stack:
        auto: false
      region:
        static: ap-northeast-2
      credentials:
        access-key: hello
        secret-key: world
---
spring:
  security:
    oauth2:
      client:
        registration:
          google:
            client-id: ${GOOGLE_CLIENT_ID}
            client-secret: ${GOOGLE_CLIENT_SECRET}
            redirect-uri: ${GOOGLE_REDIRECT_URI}
            scope: ${GOOGLE_SCOPE}
ApplicationTests 파일 설정
main 폴더에 있는 클래스들을 이용해서 의존성 주입하기 위해 @SpringBootTest 어노테이션의 매개변수로 main 폴더의 application 클래스를 넘겨주었다. (classes = HabitpayApplication.class)
1
2
3
4
5
6
7
8
9
// HabitpayApplicationTests.java

@SpringBootTest(classes = HabitpayApplication.class) // 이 부분
class HabitpayApplicationTests {

    @Test
    void contextLoads() {
    }
}
Spring Rest Docs 출력 설정 파일
Spring Rest Docs 를 html 파일로 출력할 때 관련한 설정을 공통으로 하는 추상 클래스를 정의한다.
1
2
3
4
5
6
7
8
9
10
11
12
13
14
15
16
17
18
19
20
21
22
23
24
25
26
27
28
29
30
31
32
33
34
35
36
37
38
39
// AbstractRestDocsTests.java

package com.habitpay.habitpay.docs.springrestdocs;

import org.junit.jupiter.api.BeforeEach;
import org.junit.jupiter.api.extension.ExtendWith;
import org.springframework.beans.factory.annotation.Autowired;
import org.springframework.restdocs.RestDocumentationContextProvider;
import org.springframework.restdocs.RestDocumentationExtension;
import org.springframework.test.web.servlet.MockMvc;
import org.springframework.test.web.servlet.result.MockMvcResultHandlers;
import org.springframework.test.web.servlet.setup.MockMvcBuilders;
import org.springframework.web.context.WebApplicationContext;
import org.springframework.web.filter.CharacterEncodingFilter;

import static org.springframework.restdocs.mockmvc.MockMvcRestDocumentation.documentationConfiguration;
import static org.springframework.restdocs.operation.preprocess.Preprocessors.prettyPrint;

@ExtendWith(RestDocumentationExtension.class)
public abstract class AbstractRestDocsTests {
    @Autowired
    protected MockMvc mockMvc;

    @BeforeEach
    void setUp(
            final WebApplicationContext context,
            final RestDocumentationContextProvider restDocumentation
    ) {
        this.mockMvc = MockMvcBuilders.webAppContextSetup(context)
                .apply(documentationConfiguration(restDocumentation)
                        .operationPreprocessors()
                        .withRequestDefaults(prettyPrint())
                        .withResponseDefaults(prettyPrint())
                )
                .alwaysDo(MockMvcResultHandlers.print())
                .addFilter(new CharacterEncodingFilter("UTF-8", true))
                .build();
    }
}
prettyPrint() 는 응답 json 결과를 한 줄로 보여주는 것이 아닌 개행 및 탭을 추가해서 가독성 좋게 포맷팅을 해준다.
static 메서드들은 import static 을 이용해서 코드 양을 줄일 수 있다.
1
2
import static org.springframework.restdocs.mockmvc.MockMvcRestDocumentation.documentationConfiguration;
import static org.springframework.restdocs.operation.preprocess.Preprocessors.prettyPrint;
테스트용 컨트롤러 생성
Spring Rest Docs 가 정상적으로 작동하는지 확인하기 위해 main 폴더에서 간단한 테스트용 컨트롤러를 생성한다.
1
2
3
4
5
6
7
8
9
10
11
12
13
14
15
// RestDocsController.java

package com.habitpay.habitpay.domain.restdocs;

import org.springframework.web.bind.annotation.GetMapping;
import org.springframework.web.bind.annotation.RestController;

@RestController
public class RestDocsController {

    @GetMapping("/restDocs")
    public String getRestDocs() {
        return "hello";
    }
}
GET /restDocs 요청을 보내면 hello 를 응답하는 컨트롤러를 생성했다.
테스트 코드 작성
test 폴더에서 GET /restDocs 컨트롤러에 대한 테스트 코드를 작성한다.
1
2
3
4
5
6
7
8
9
10
11
12
13
14
15
16
17
18
19
20
21
22
23
24
25
26
27
28
29
30
31
32
33
34
35
// RestDocsControllerTest.java

package com.habitpay.habitpay;

import com.habitpay.habitpay.docs.springrestdocs.AbstractRestDocsTests;
import com.habitpay.habitpay.domain.restdocs.RestDocsController;
import com.habitpay.habitpay.global.config.auth.CorsConfig;
import com.habitpay.habitpay.global.config.jwt.TokenProvider;
import com.habitpay.habitpay.global.config.jwt.TokenService;
import org.junit.jupiter.api.Test;
import org.springframework.boot.test.autoconfigure.web.servlet.WebMvcTest;
import org.springframework.boot.test.mock.mockito.MockBean;

import static org.springframework.restdocs.mockmvc.MockMvcRestDocumentation.document;
import static org.springframework.test.web.servlet.request.MockMvcRequestBuilders.get;
import static org.springframework.test.web.servlet.result.MockMvcResultMatchers.status;

@WebMvcTest(RestDocsController.class)
public class RestDocsControllerTest extends AbstractRestDocsTests {

    @MockBean
    TokenService tokenService;

    @MockBean
    TokenProvider tokenProvider;

    @MockBean
    CorsConfig corsConfig;

    @Test
    void RestDocsTest() throws Exception {
        mockMvc.perform(get("/restDocs")).andExpect(status().isOk())
                .andDo(document("rest-docs"));
    }
}
main 애플리케이션에서 Cors 설정, jwt 토큰 관련 설정을 했기 때문에 @MockBean 으로 의존성을 주입해주었다.
위의 코드와 같이 반드시 똑같이 할 필요는 없다. 에러 메세지를 보면서 어떤 클래스가 주입되어야 하는지 판단하면 된다.
아래의 코드는 어떤 이름을 가진 문서로 생성할 것인지 설정하는 부분이다.
위에서 index.adoc 파일에서 include 했던 test.adoc 파일과 관련있다.
1
.andDo(document("rest-docs"));
테스트 코드 API 문서 작성
src/docs/asciidoc 디렉토리에 생성했던 index.adoc 파일에서 test.adoc 파일을 include 하도록 했는데, 이번에는 test.adoc 파일을 작성할 것이다.
1
2
3
== RestDocsTestController

operation::rest-docs[snippets="http-request,http-response"]
눈 여겨볼 부분은 operation::rest-docs 이다.
바로 앞에서 작성한 테스트 코드에서 .andDo(document("rest-docs") 에 입력한 rest-docs 와 연결된다.
즉, GET /restDocs 와 관련한 API 명세는 rest-docs 라는 유일한 키로 식별한다는 의미이다.
EnableJpaAuditing 설정 파일 분리
JPA 에서는 Audit 기능을 이용해서 시간에 대한 값을 자동으로 넣어주고 있다.
1
2
3
4
5
6
7
8
9
10
11
12
13
@Getter
@MappedSuperclass
@EntityListeners(AuditingEntityListener.class)
public abstract class BaseTime {
    @CreatedDate
    private LocalDateTime createdAt;

    @LastModifiedDate
    private LocalDateTime modifiedAt;

    @Column
    private LocalDateTime deletedAt;
}
이를 이용하기 위해서 Application 메인 클래스에 아래와 같은 어노테이션을 추가했다.
1
2
3
4
5
6
7
8
9
@EnableJpaAuditing
@SpringBootApplication
public class HabitpayApplication {

    public static void main(String[] args) {
        SpringApplication.run(HabitpayApplication.class, args);
    }

}
하지만 테스트 코드를 실행하면 아래와 같은 오류가 발생한다.
1
Caused by: java.lang.IllegalArgumentException: JPA metamodel must not be empty
원인은 컨트롤러 테스트에 사용하는 @WebMvcTest 의 작동 원리에 있었다.
@WebMvcTest 어노테이션을 사용하면 Spring Mvc 컴포넌트 이외에는 모든 자동 구성이 비활성화된다.
적용되는 어노테이션은 아래와 같다.
@Controller,@ControllerAdvice,@JsonComponent,Converter/GenericConverter,Filter,WebMvcConfigurer,HandlerMethodArgumentResolve
즉, @WebMvcTest 를 이용해서 컨트롤러 테스트를 할 때 JPA Auditing 관련 빈이 등록되지 않은 상태로 @EnableJpaAuditing 어노테이션이 적용된 것인데, JPA 관련 빈을 찾지 못해 발생한 오류인 것이다.
따라서 애플리케이션을 실행할 때는 필요하지만 테스트 실행에서는 필요없기 때문에 @Configuration 별도로 분리했다.
그러면 컨트롤러 테스트를 할 때 @Configuration 이 설정된 빈은 등록하지 않기 때문에 JPA 관련 오류가 발생하지 않는다.
1
2
3
4
5
6
7
8
9
10
11
// JpaConfiguration.java

package com.habitpay.habitpay.global.config;

import org.springframework.context.annotation.Configuration;
import org.springframework.data.jpa.repository.config.EnableJpaAuditing;

@Configuration
@EnableJpaAuditing
public class JpaConfiguration {
}
asciidoctor 실행
프로젝트 최상단에서 터미널에 아래의 명령어를 실행한다.
1
./gradlew asciidoctor
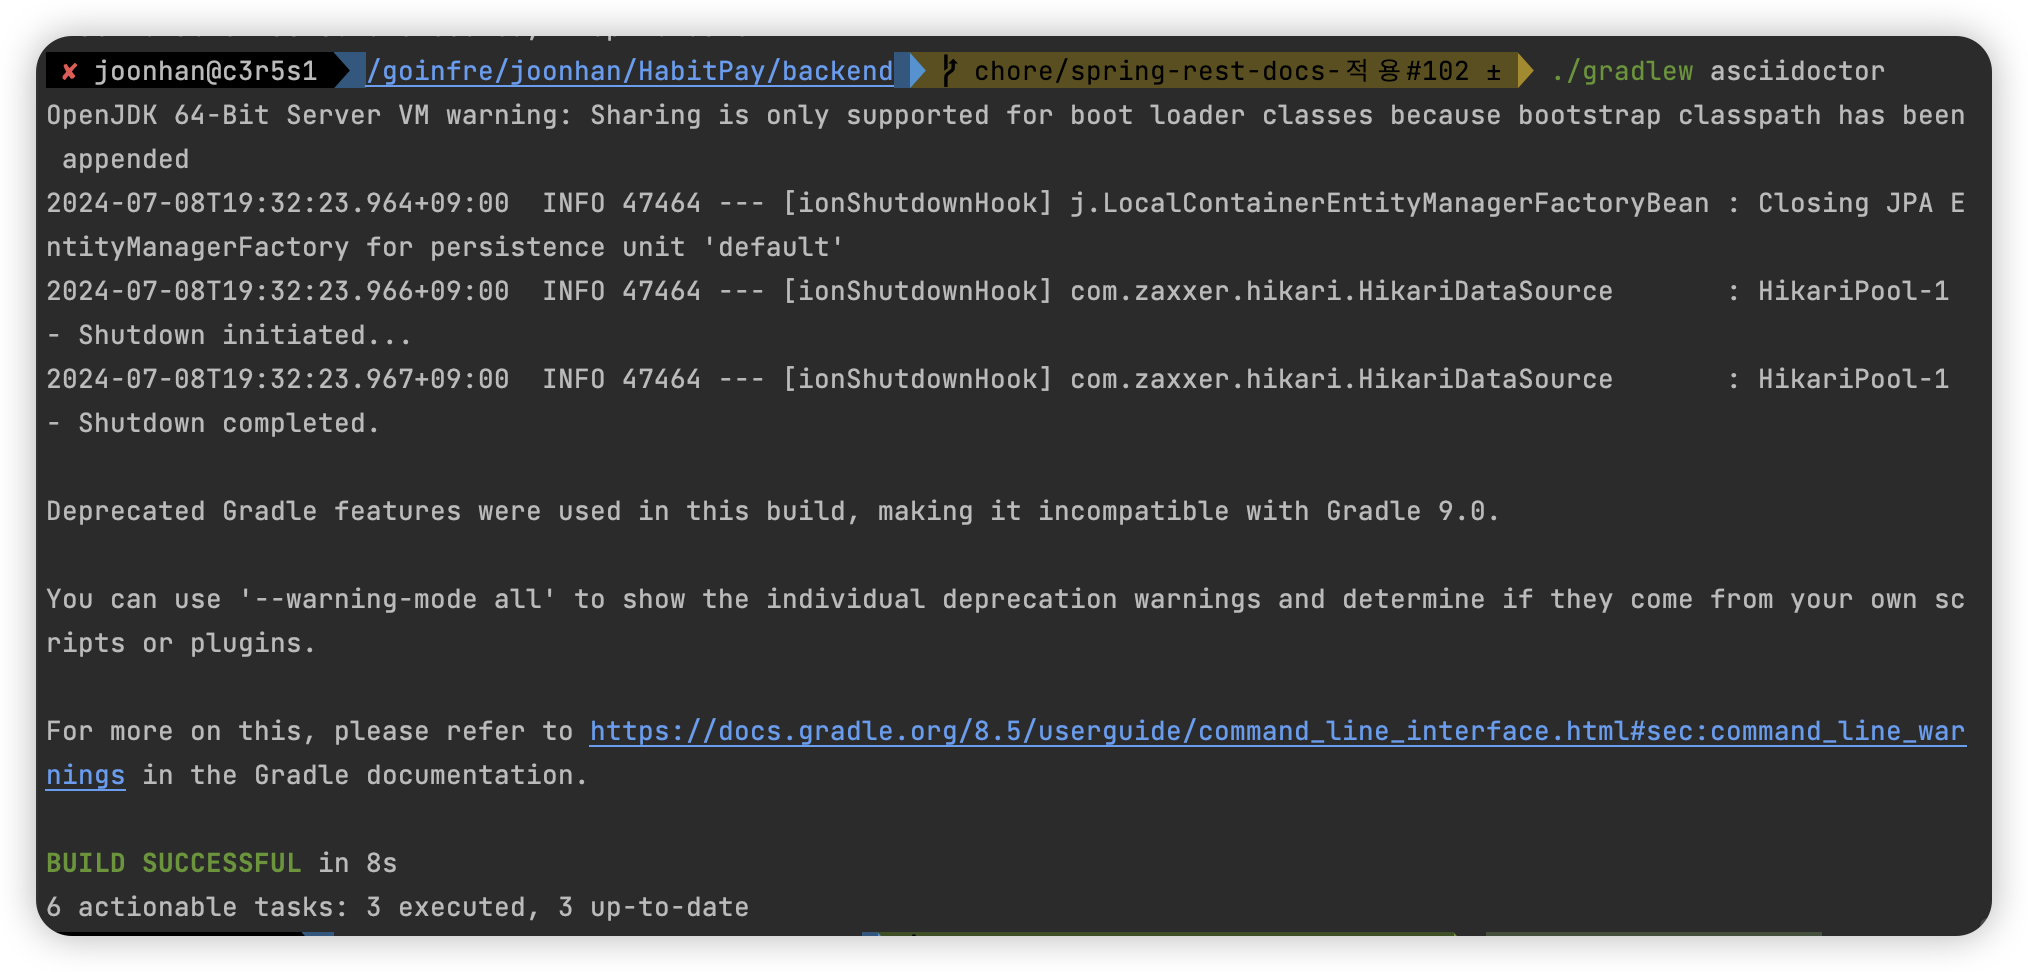
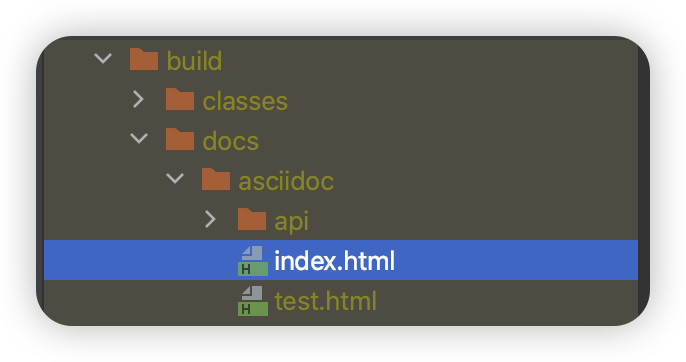
정상적으로 실행되었다면 BUILD SUCCESSFUL 이 표시되고, build/docs 폴더에 index.html 파일과 test.html 파일이 생성된다.
생성된 파일을 쉽게 보기 위해 IntelliJ 에서 AsciiDoc 플러그인을 설치한다.
MacOS 기준 command + , 을 입력하고 [Preferences] 창에 진입한다.
이후 [Plugins] 항목에서 [asciidoc] 을 검색해서 설치한다.

src/docs/asciidocs/index.adoc 파일을 열어보면 아래의 이미지와 같이 우측에는 미리보기가 표시된다.
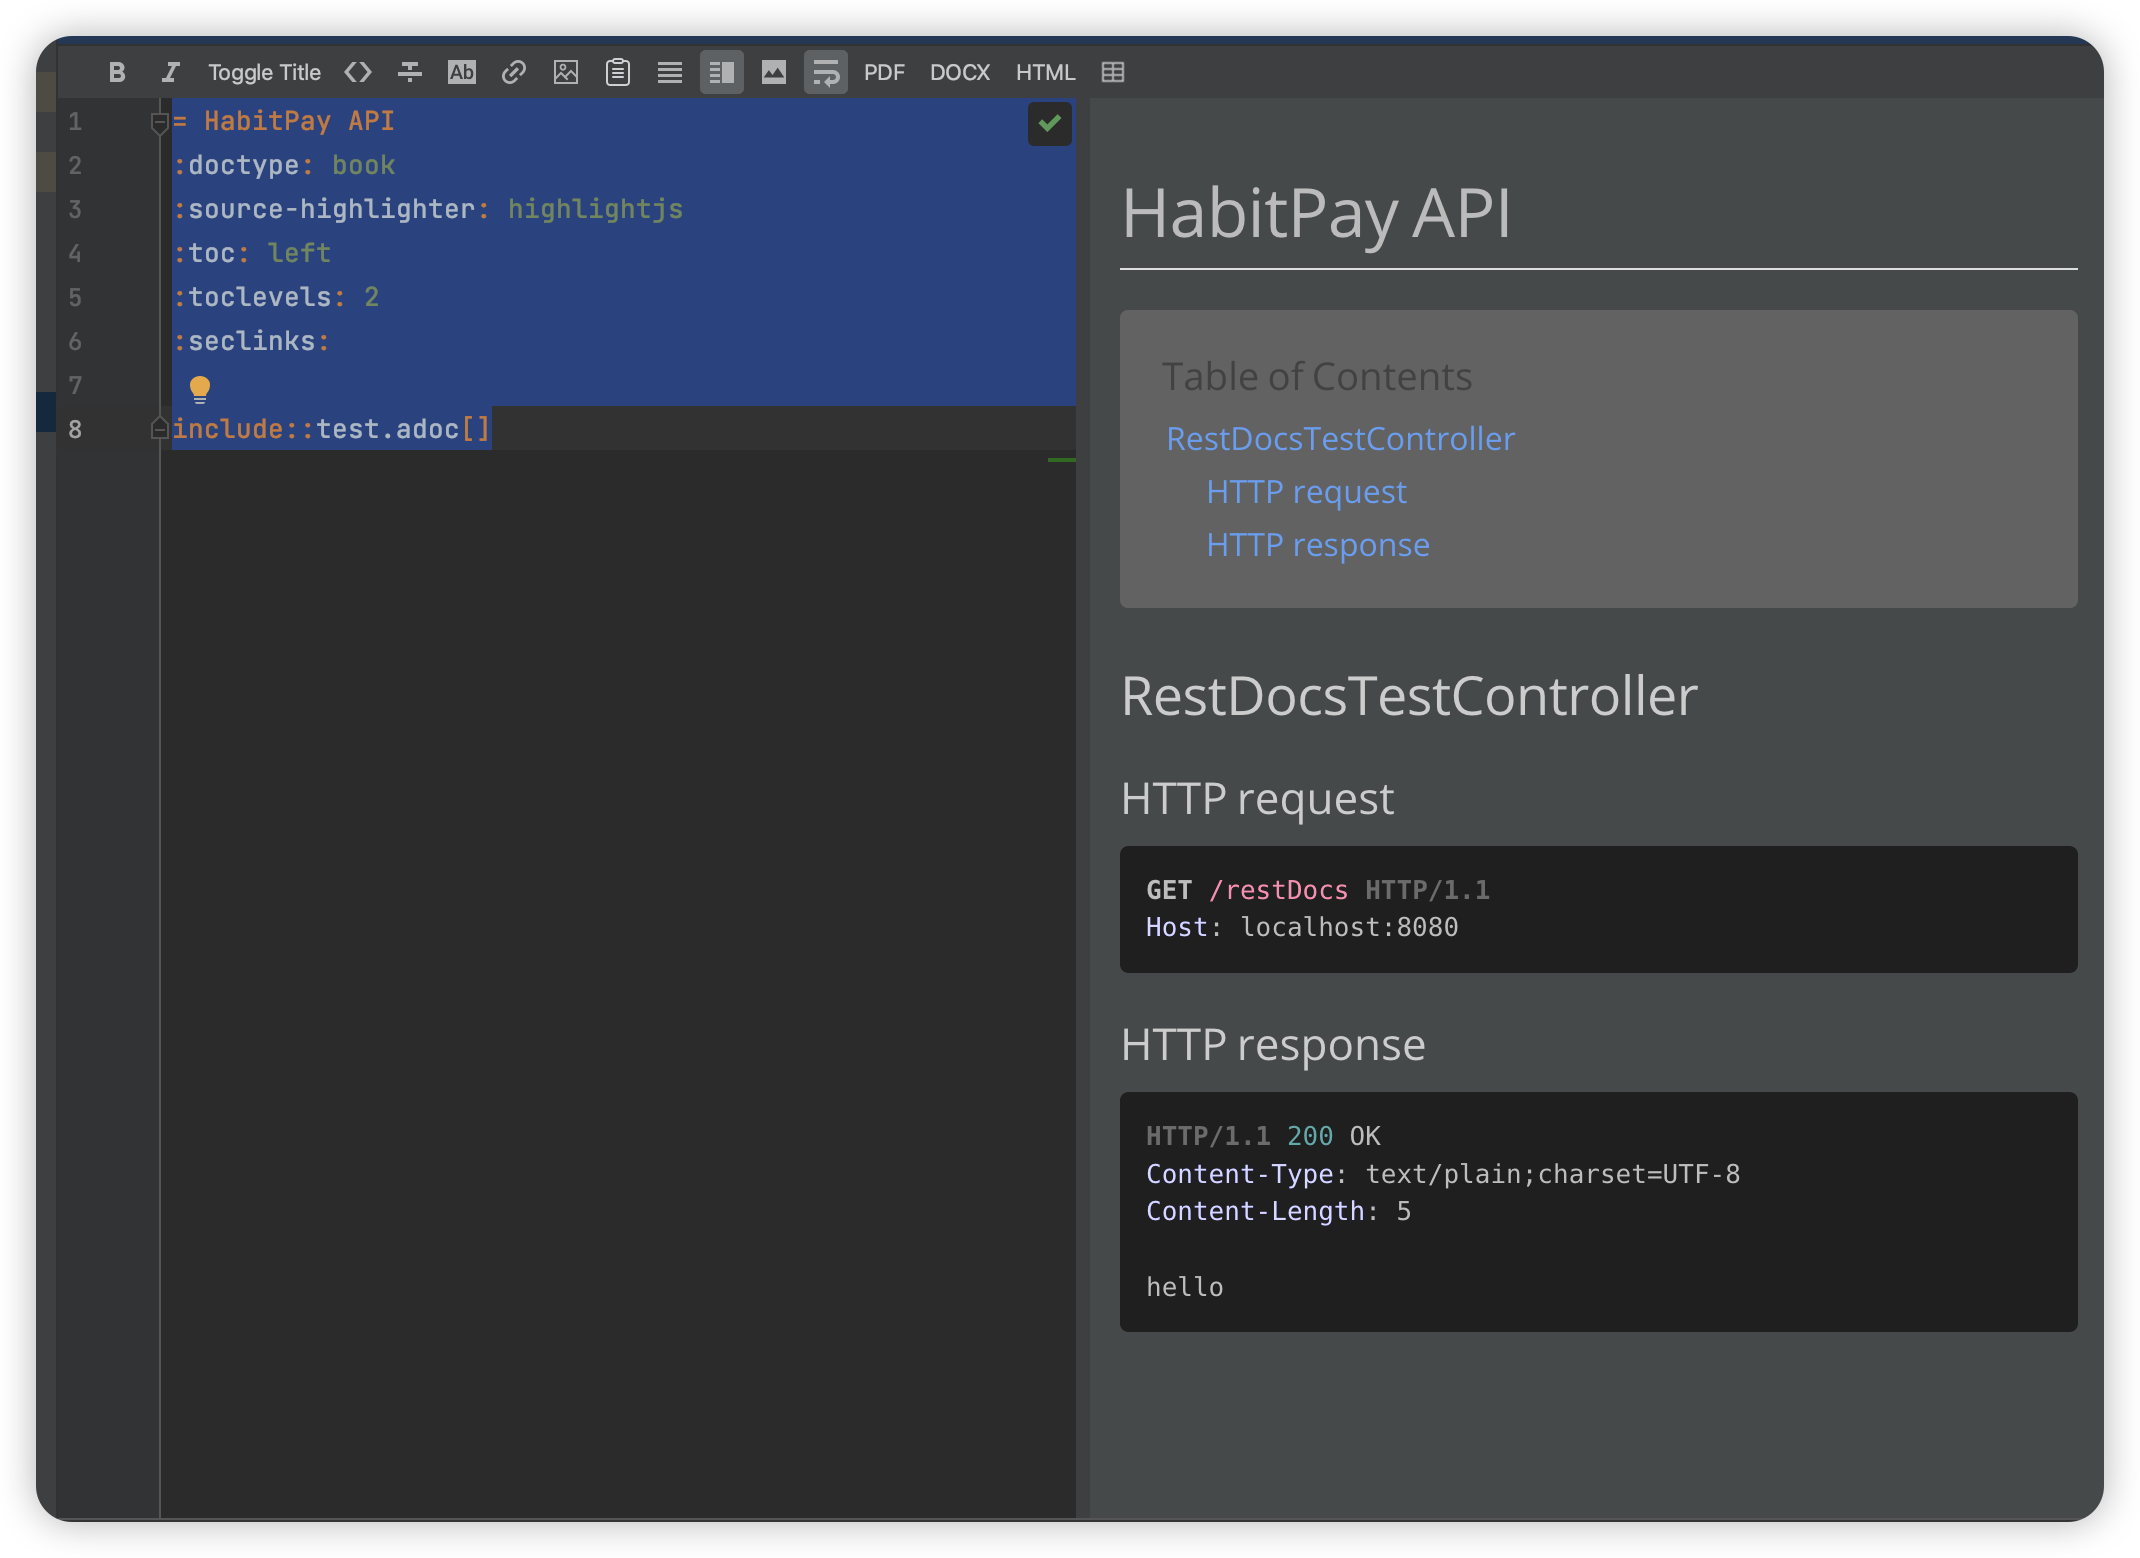
build/docs 폴더에 생성한 정적 파일을 Github Pages 에 배포하면 링크를 이용해서 편리하게 API 명세서를 확인할 수 있다.
Github Actions 설정
Github Actions 를 이용해서 Github Pages 배포를 할 수 있다.
Github Pages 는 Github 에서 repository 에서 배포하는 정적 페이지를 도메인을 이용해서 배포해주는 서비스이다.
이를 이용하면 https://habitpay.github.io/backend/ 링크를 통해 API 명세서를 확인할 수 있다.
Github Pages 설정
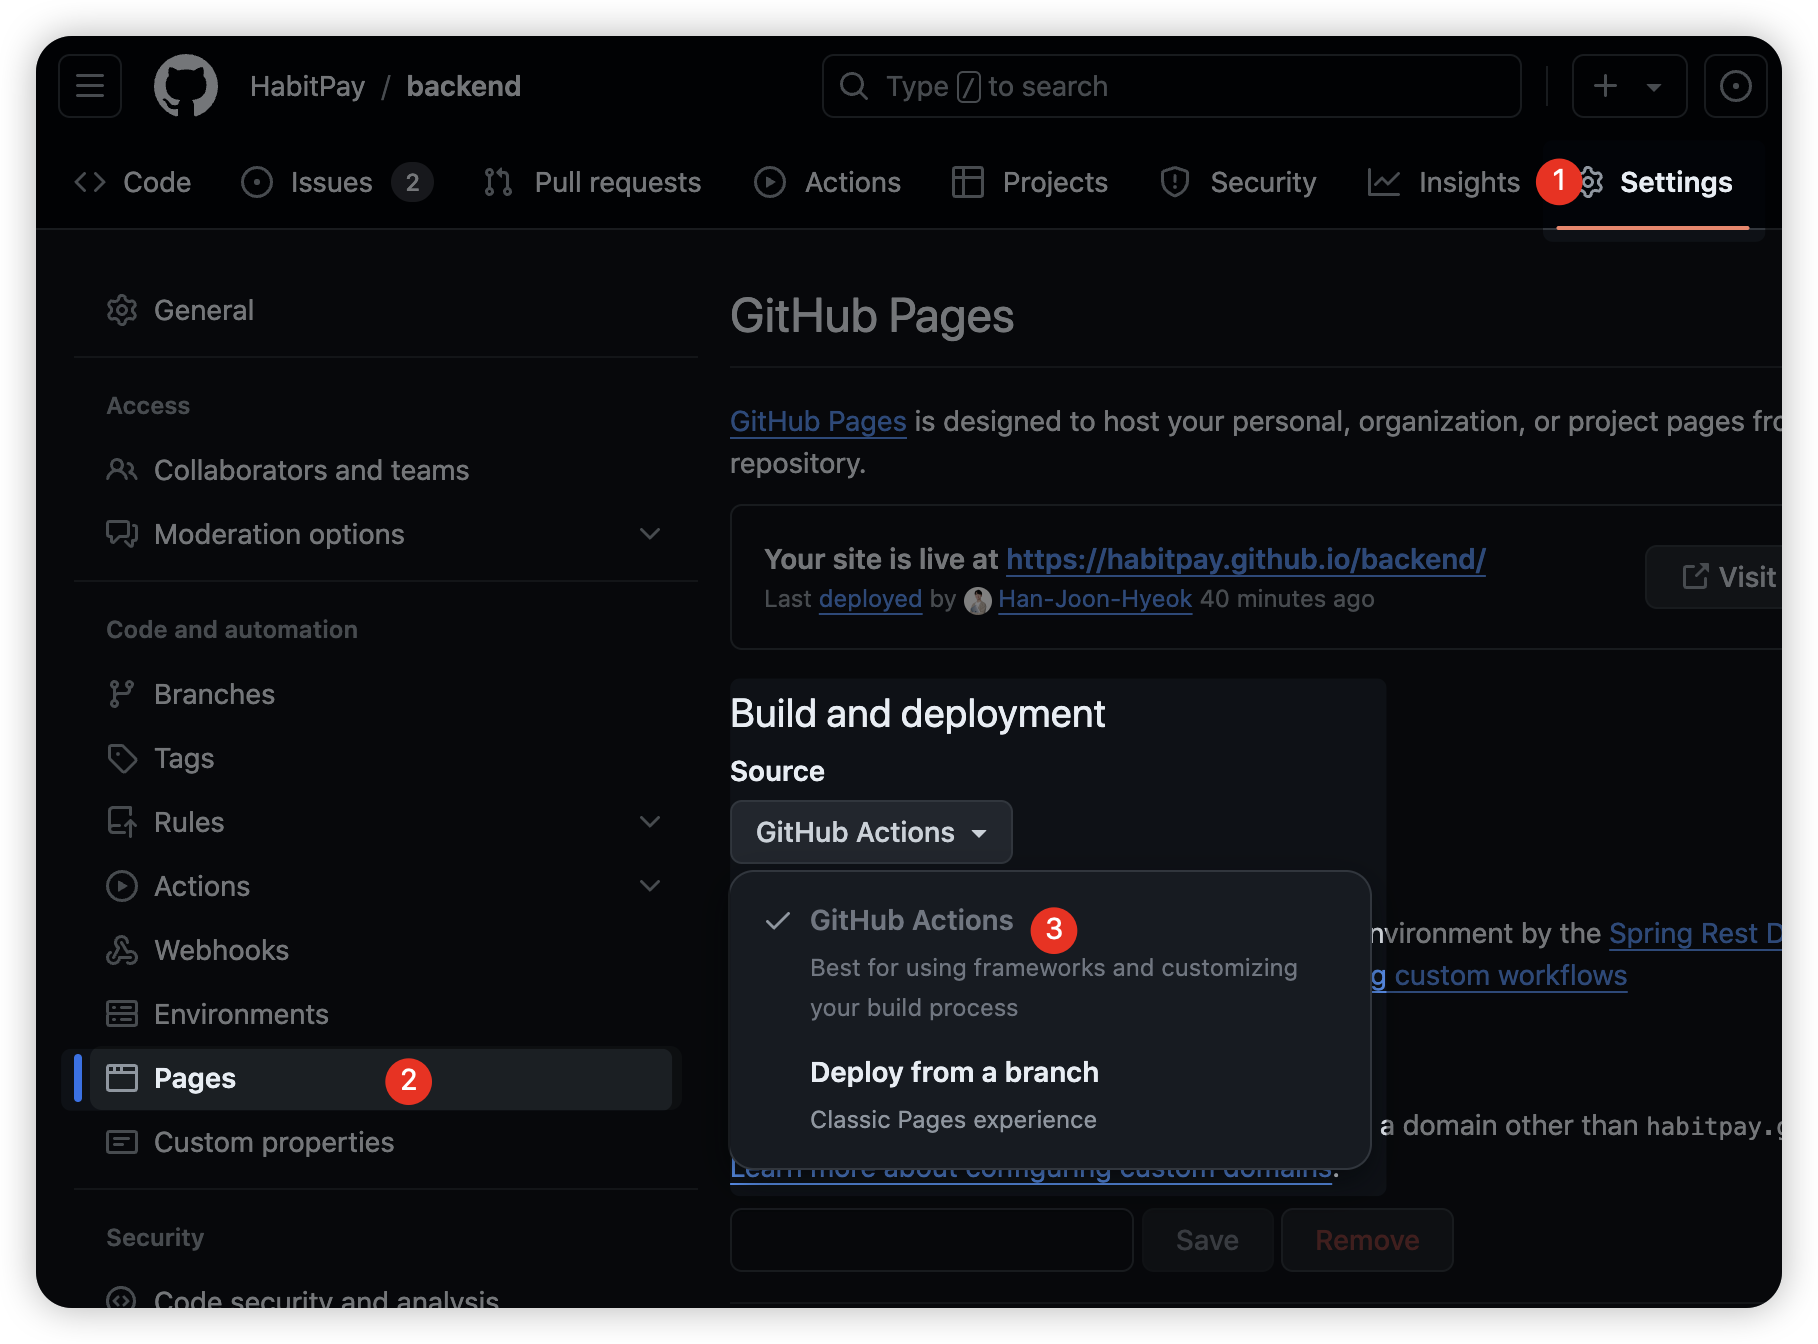
Github Actions 파일을 작성하기 전에 Github Repository 에서 Github Actions 를 이용한 Github Pages 생성을 허용해주어야 한다.
아래의 이미지와 같이 Repository 의 [Settings] - [Pages] 로 접근한 후 [Build and deployment] 항목에서 [Github Actions] 를 선택한다.
workflow 파일 생성
프로젝트 최상단 경로에서 .github/workflows 폴더를 생성한다.
여기서는 api-docs.yaml 이라는 파일을 생성했다.
파일 이름은 자유롭게 작성해도 된다.
1
2
3
4
5
6
7
8
9
10
11
12
13
14
15
16
17
18
19
20
21
22
23
24
25
26
27
28
29
30
31
32
33
34
35
36
37
38
39
40
name: Spring Rest Docs

on:
  push:
    branches:
      - main

concurrency:
  group: github-pages
  cancel-in-progress: true

jobs:
  deploy:
    permissions:
      pages: write
      id-token: write
    environment:
      name: github-pages
      url: $
    runs-on: ubuntu-latest
    steps:
      - name: Checkout
        uses: actions/checkout@v4
      - name: Set up Pages
        uses: actions/configure-pages@v5
      - name: Set up JDK 17
        uses: actions/setup-java@v4
        with:
          java-version: "17"
          distribution: "temurin"
          cache: "gradle"
      - name: Build Asciidoc
        run: ./gradlew asciidoctor
      - name: Upload pages artifact
        uses: actions/upload-pages-artifact@v3
        with:
          path: "./build/docs/asciidoc"
      - name: Deploy to GitHub Pages
        id: deployment
        uses: actions/deploy-pages@v4
각 항목들을 간단하게 짚으면 아래와 같다.
concurrency
여러 actions 이 실행되었을 때 가장 마지막에 실행한 것만 결과에 반영되도록 순서를 보장해준다.
여기서는 github-pages 라는 그룹 이름을 가진 Github Actions 들이 실행될 때 가장 마지막에 실행한 것만 결과에 반영하는 것이다.
1
2
3
concurrency:
  group: github-pages
  cancel-in-progress: true
permissions
Github Actions 가 사용할 수 있는 권한을 제어하는 부분이다.
pages: Github Pages 에 배포할 수 있는 권한을 부여한다.id-token: Github Actions 를 외부 서비스와 연동해서 사용하는 경우(AWS, Azure 등) 안전하게 인증할 수 있도록 ID 토큰을 사용할 수 있는 권한을 부여한다. (참고 링크)
1
2
3
permissions:
  pages: write
  id-token: write
actions 버전 설정
actions 는 버전에 따라 다르게 작동하기도 하기 때문에 버전을 확인하는 것이 필요하다.
예를 들어, actions/checkout 은 Github Repository (링크) 에 접속해보면 최신 Release 가 v4.1.7 로 되어 있는 것을 확인할 수 있다.
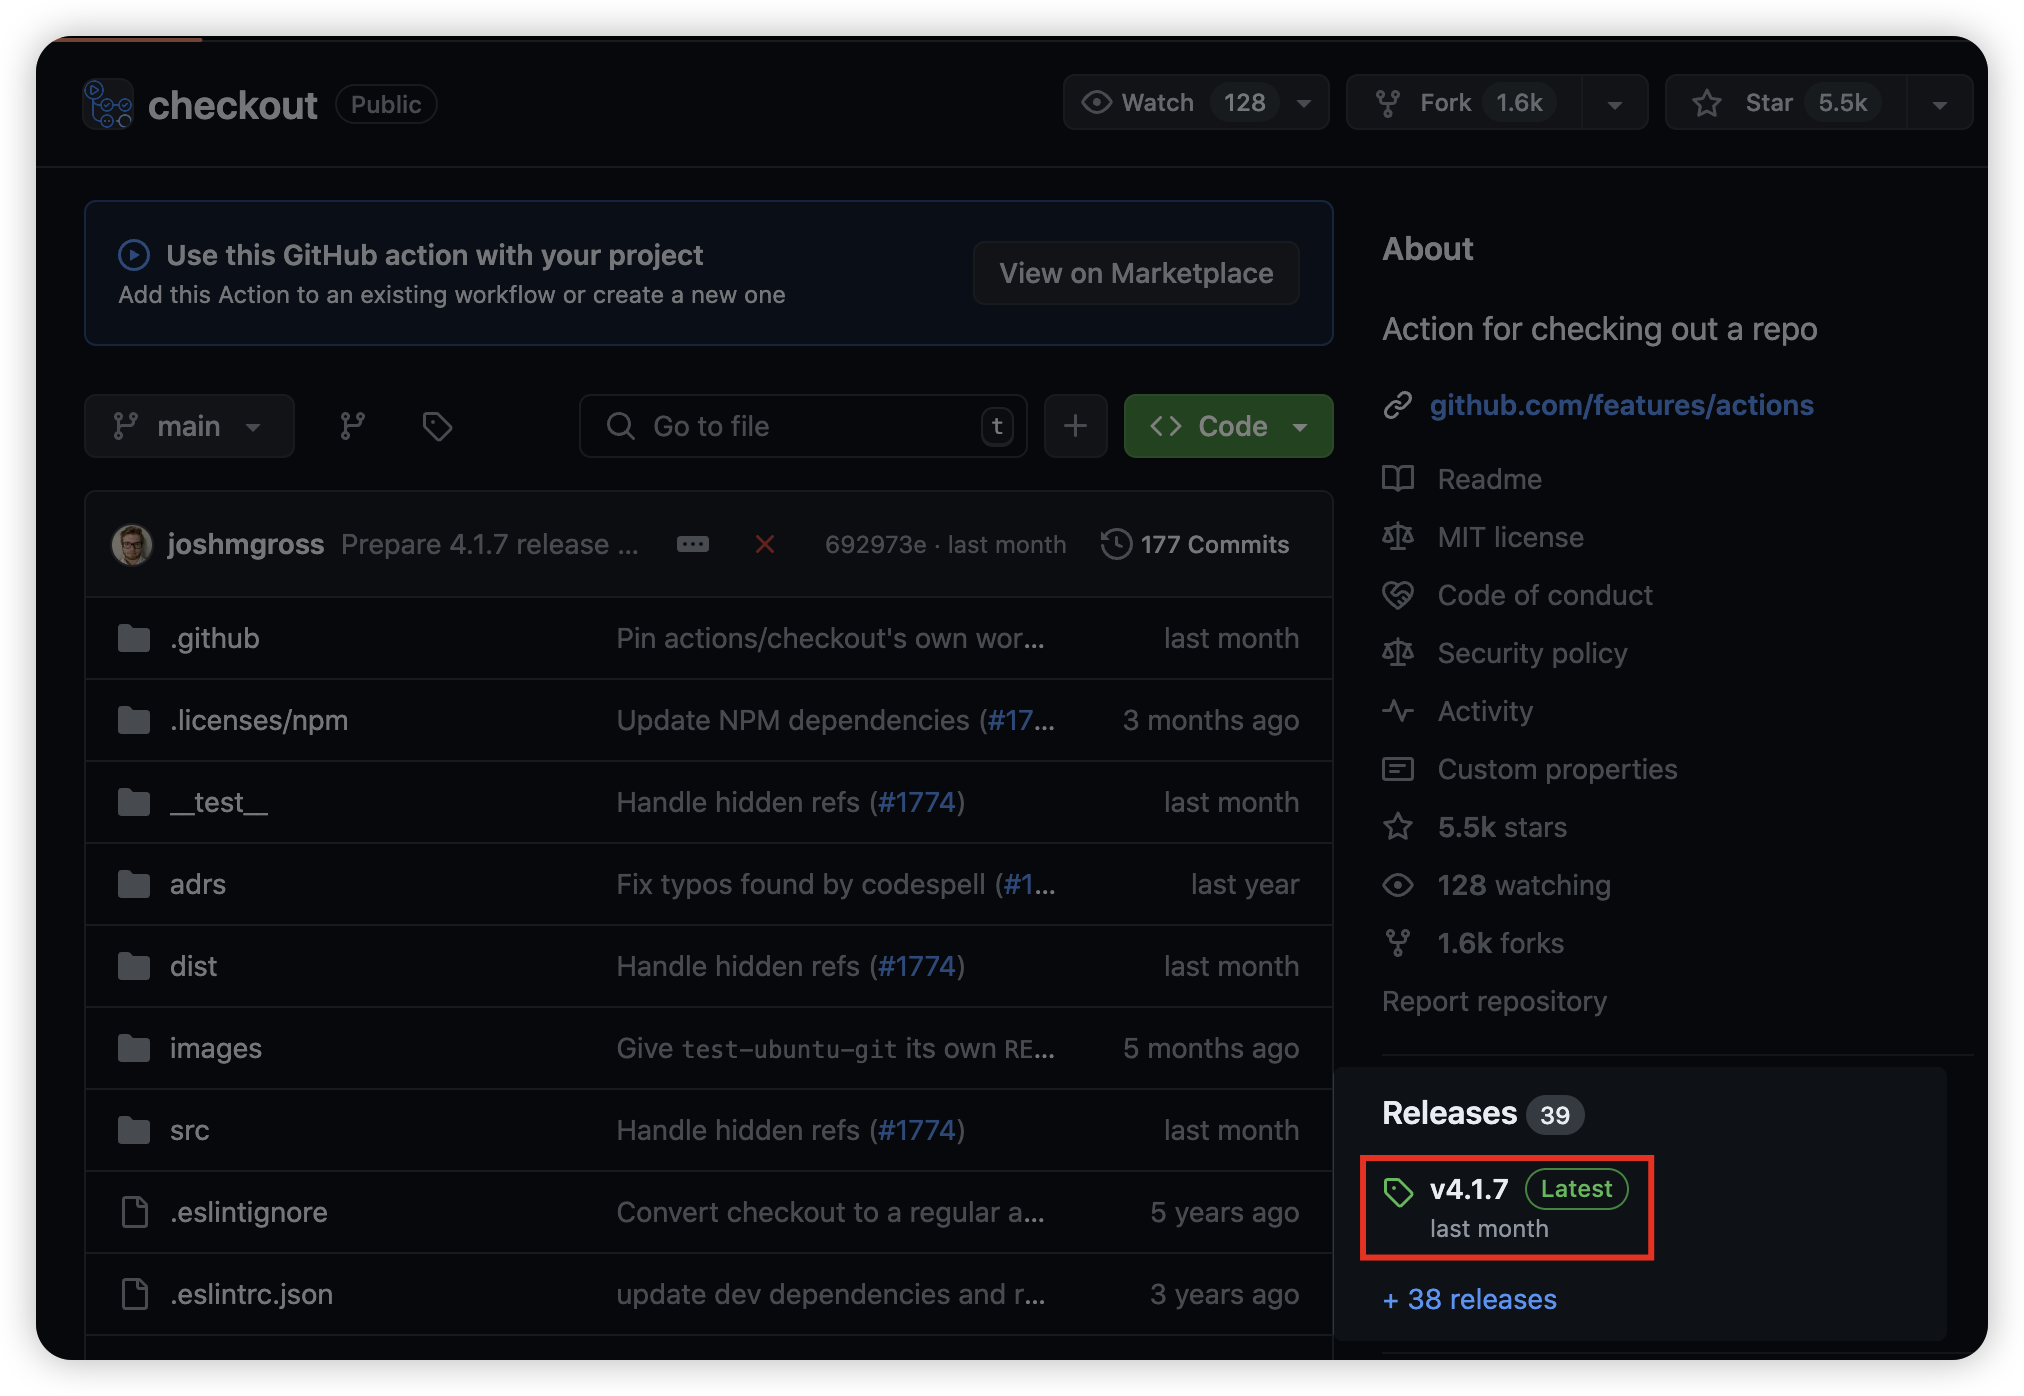
그래서 아래와 같이 작성하면 자동으로 최신 버전인 v4.1.7 을 사용할 수 있다.
1
2
- name: Checkout
  uses: actions/checkout@v4
각 step 마다 사용하는 actions 의 공식 Repository 에 접속해서 최신 버전을 사용하자.
actions/checkout
Github Repository 의 파일을 Github Actions 이 실행하는 가상 머신에 Clone 받는 작업이다.
actions/configure-pages
Github Pages 를 배포하기 위한 관련 파일을 설치하는 작업이다.
actions/setup-java
프로젝트에서 사용하는 java 버전에 맞춰서 설정한다. (참고 링크)
1
2
3
4
5
6
- name: Set up JDK 17
  uses: actions/setup-java@v4
  with:
    java-version: "17"
    distribution: "temurin"
    cache: "gradle"
cache항목은 이전에 빌드할 때 사용했던 파일이 있으면 추가로 생성하지 않도록 캐싱을 해서 작업 속도를 단축시켜준다. (참고 링크)- maven 을 사용한다면
gradle대신maven을 입력하면 된다.
./gradlew asciidoctor
테스트 코드를 실행해서 adoc 파일을 html 파일로 만드는 작업이다.
로컬에서 실행한 것과 동일하다.
actions/upload-pages-artifact
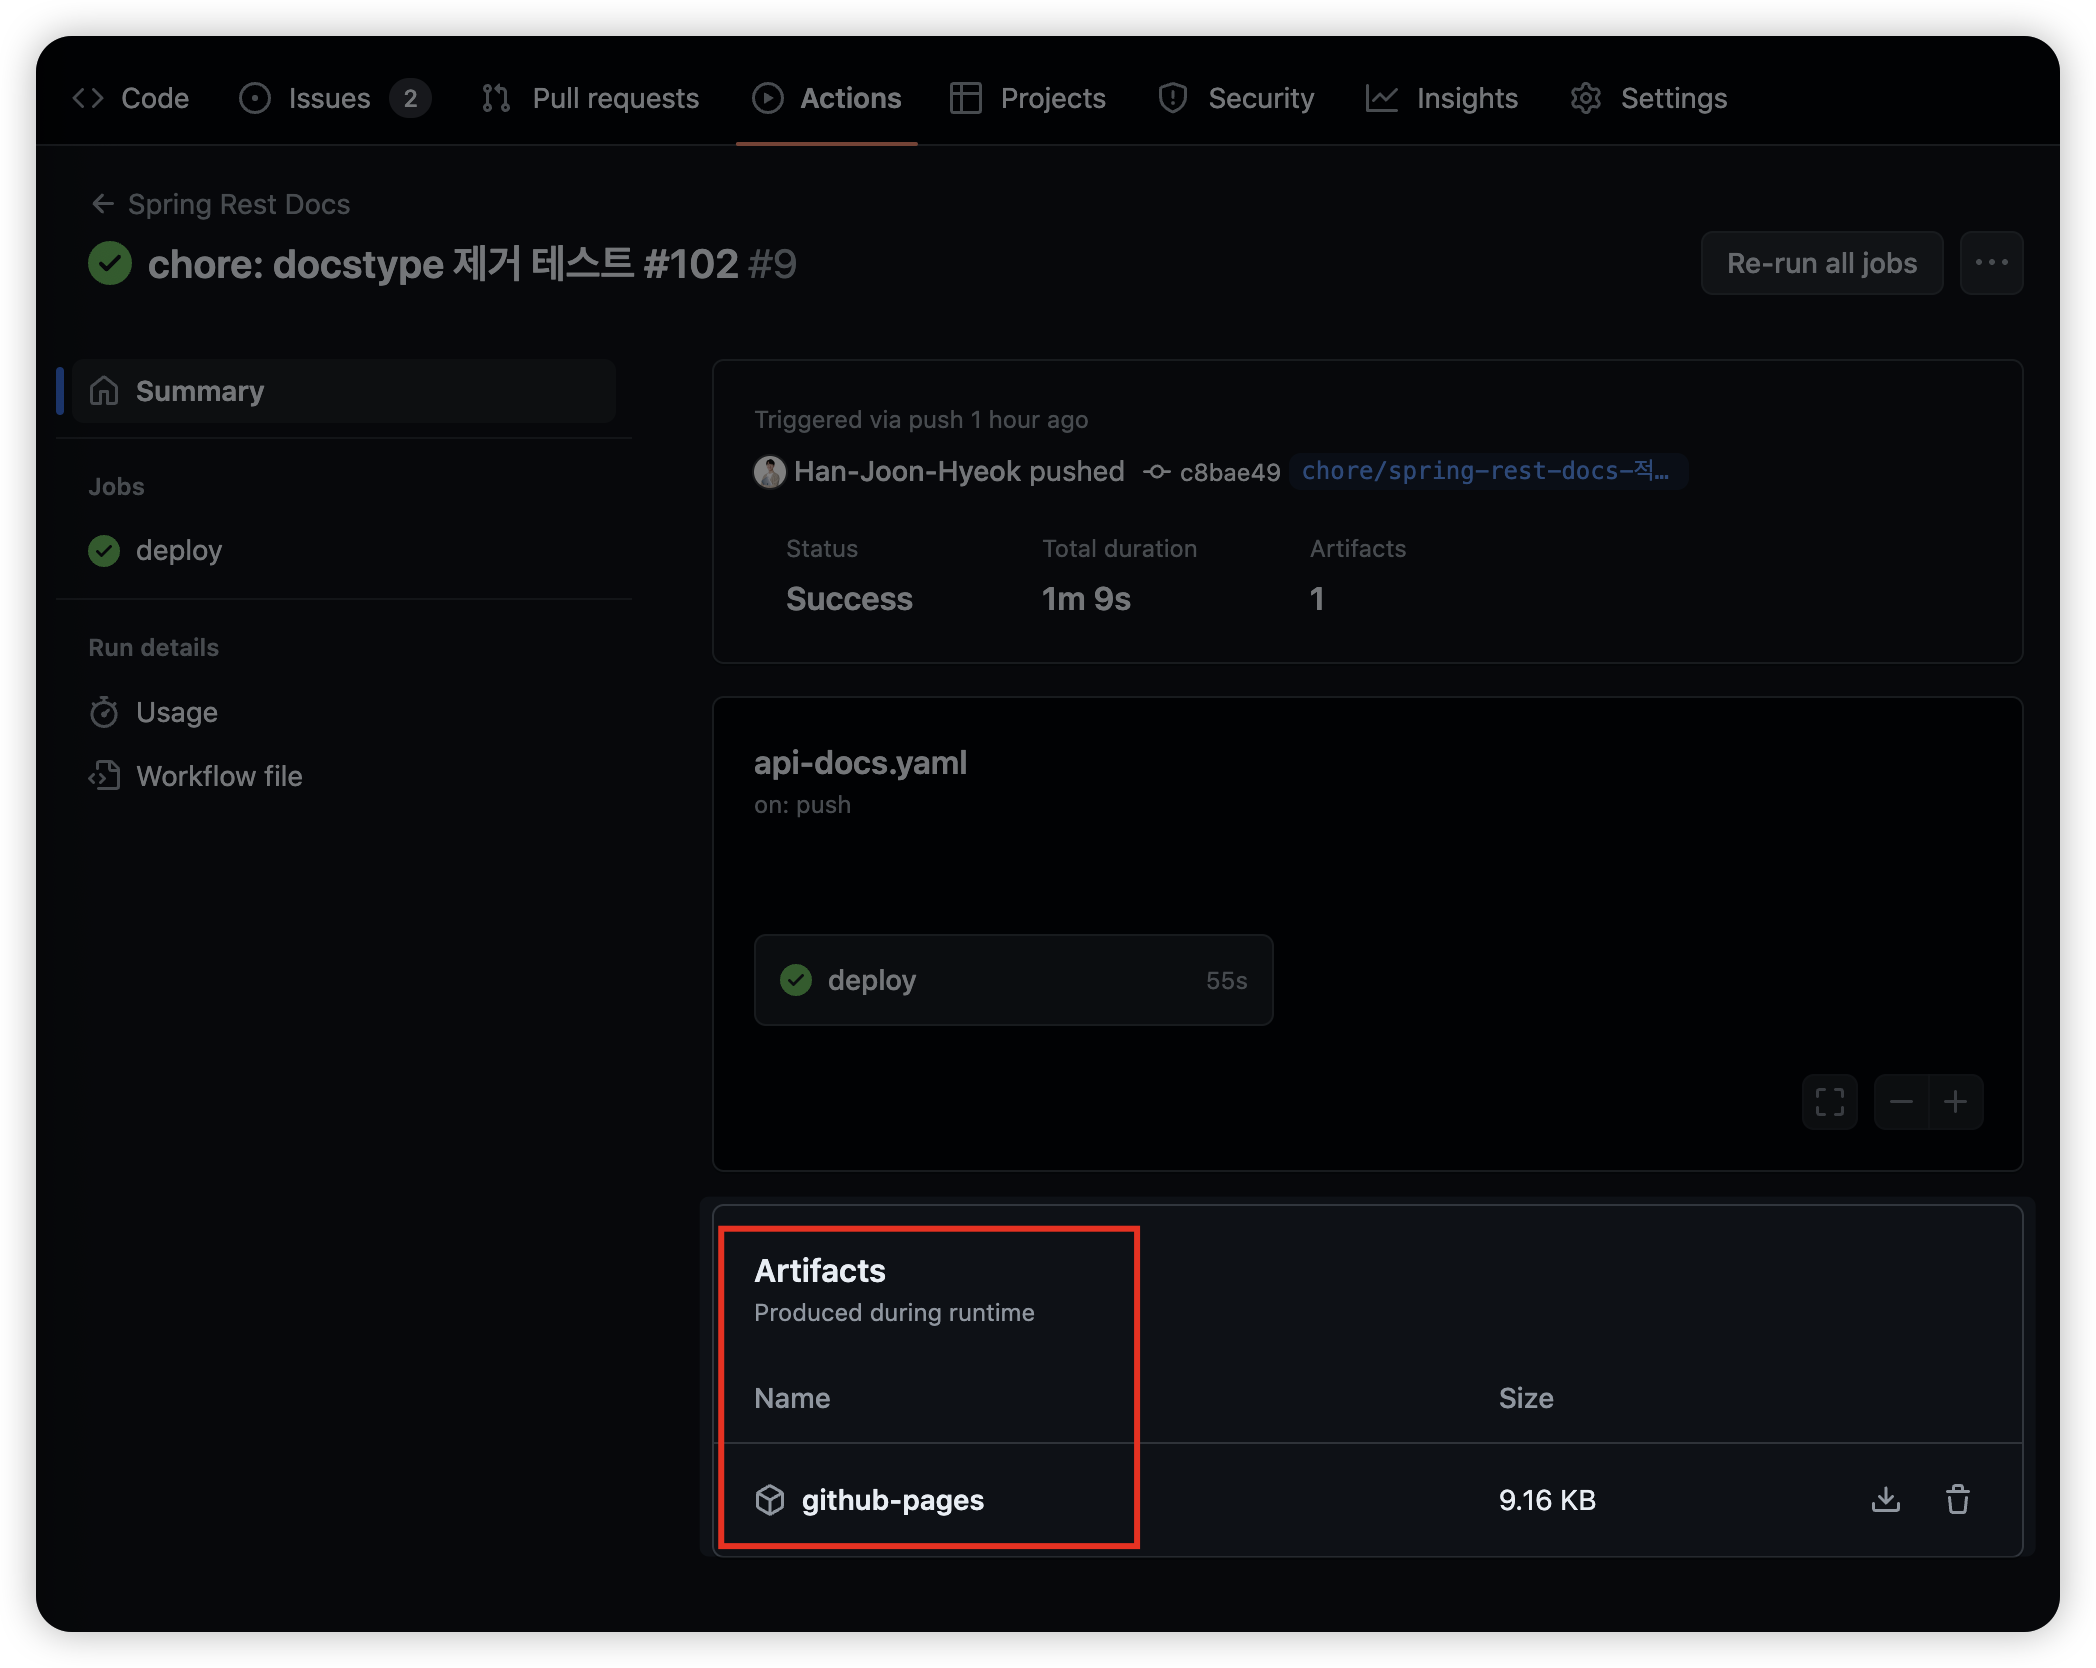
Github Actions 에서 Github Pages 로 배포하기 위해서는 artifact 를 업로드 해야 한다.
그래서 build/docs/asciidoc 경로에 생성된 html 파일을 압축해서 Github Actions 실행 결과에 업로드한다.
실제로 Github Actions 를 실행하면 [Summary] 페이지에서 [Artifacts] 항목에 파일이 업로드 된 것을 확인할 수 있다.
actions/deploy-pages
업로드한 Artifacts 를 Github Pages 로 배포한다.
배포가 완료되면 https://[organization-or-user].github.io/[repository] 링크로 접속할 수 있고, 접속하면 아래와 같은 화면이 표시된다.

특정 브랜치에서 Github Actions 작동 허용하기
main 브랜치가 아닌 다른 브랜치에서 Github Actions 작동 테스트를 하고 싶다면 Repository 의 [Setting] - [Environments] 항목으로 접근한다.
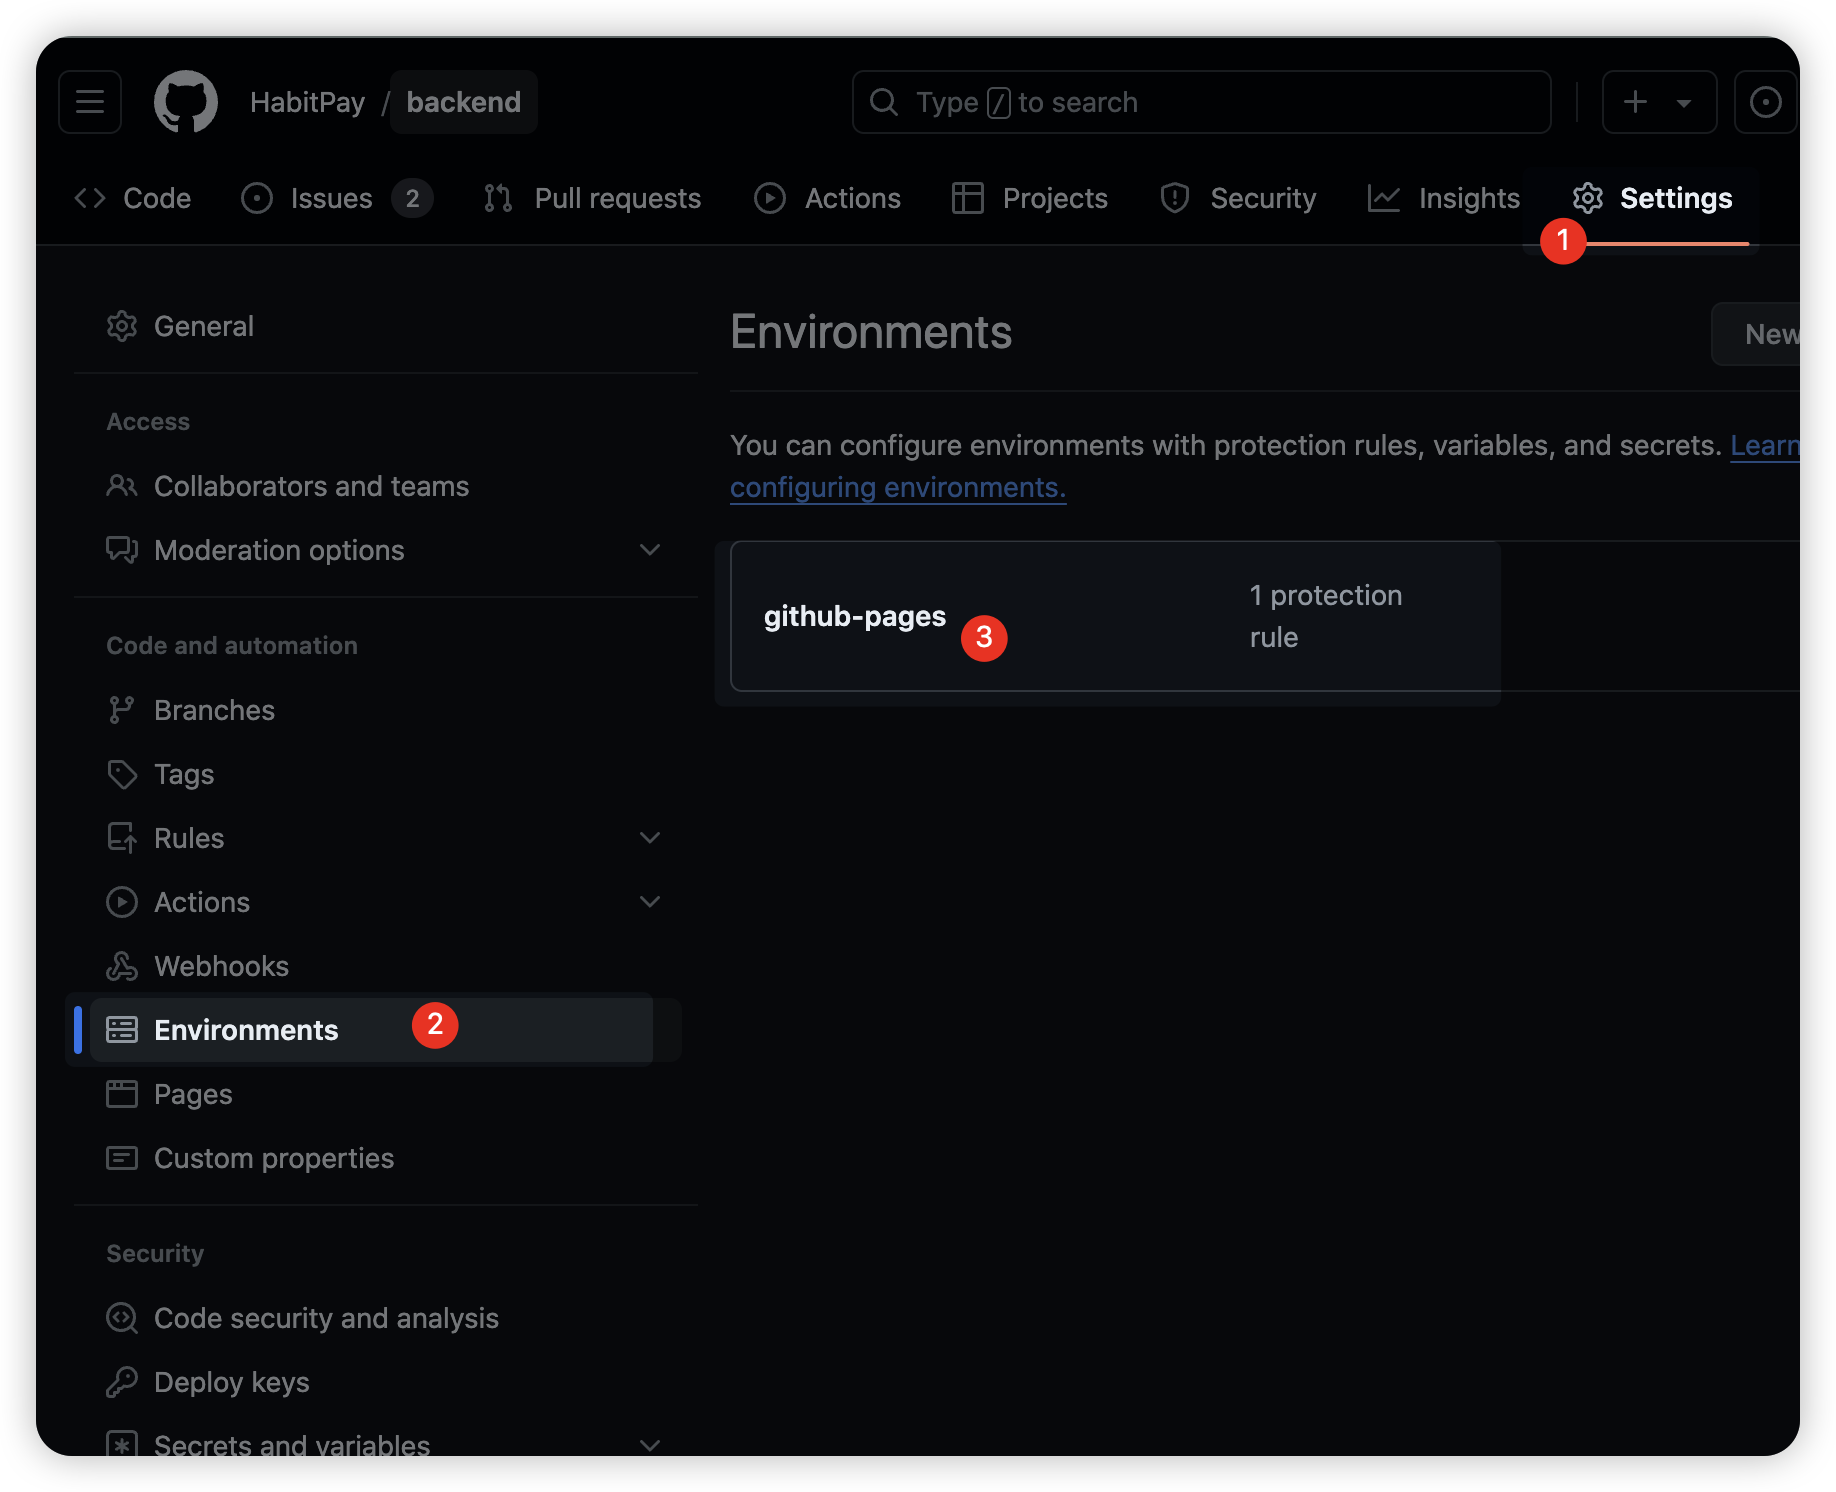
그러면 Github Actions 에서 생성한 환경이 있는데, 이를 클릭한다.
그 다음 [Add deployment branch or tag rule] 을 클릭한다.
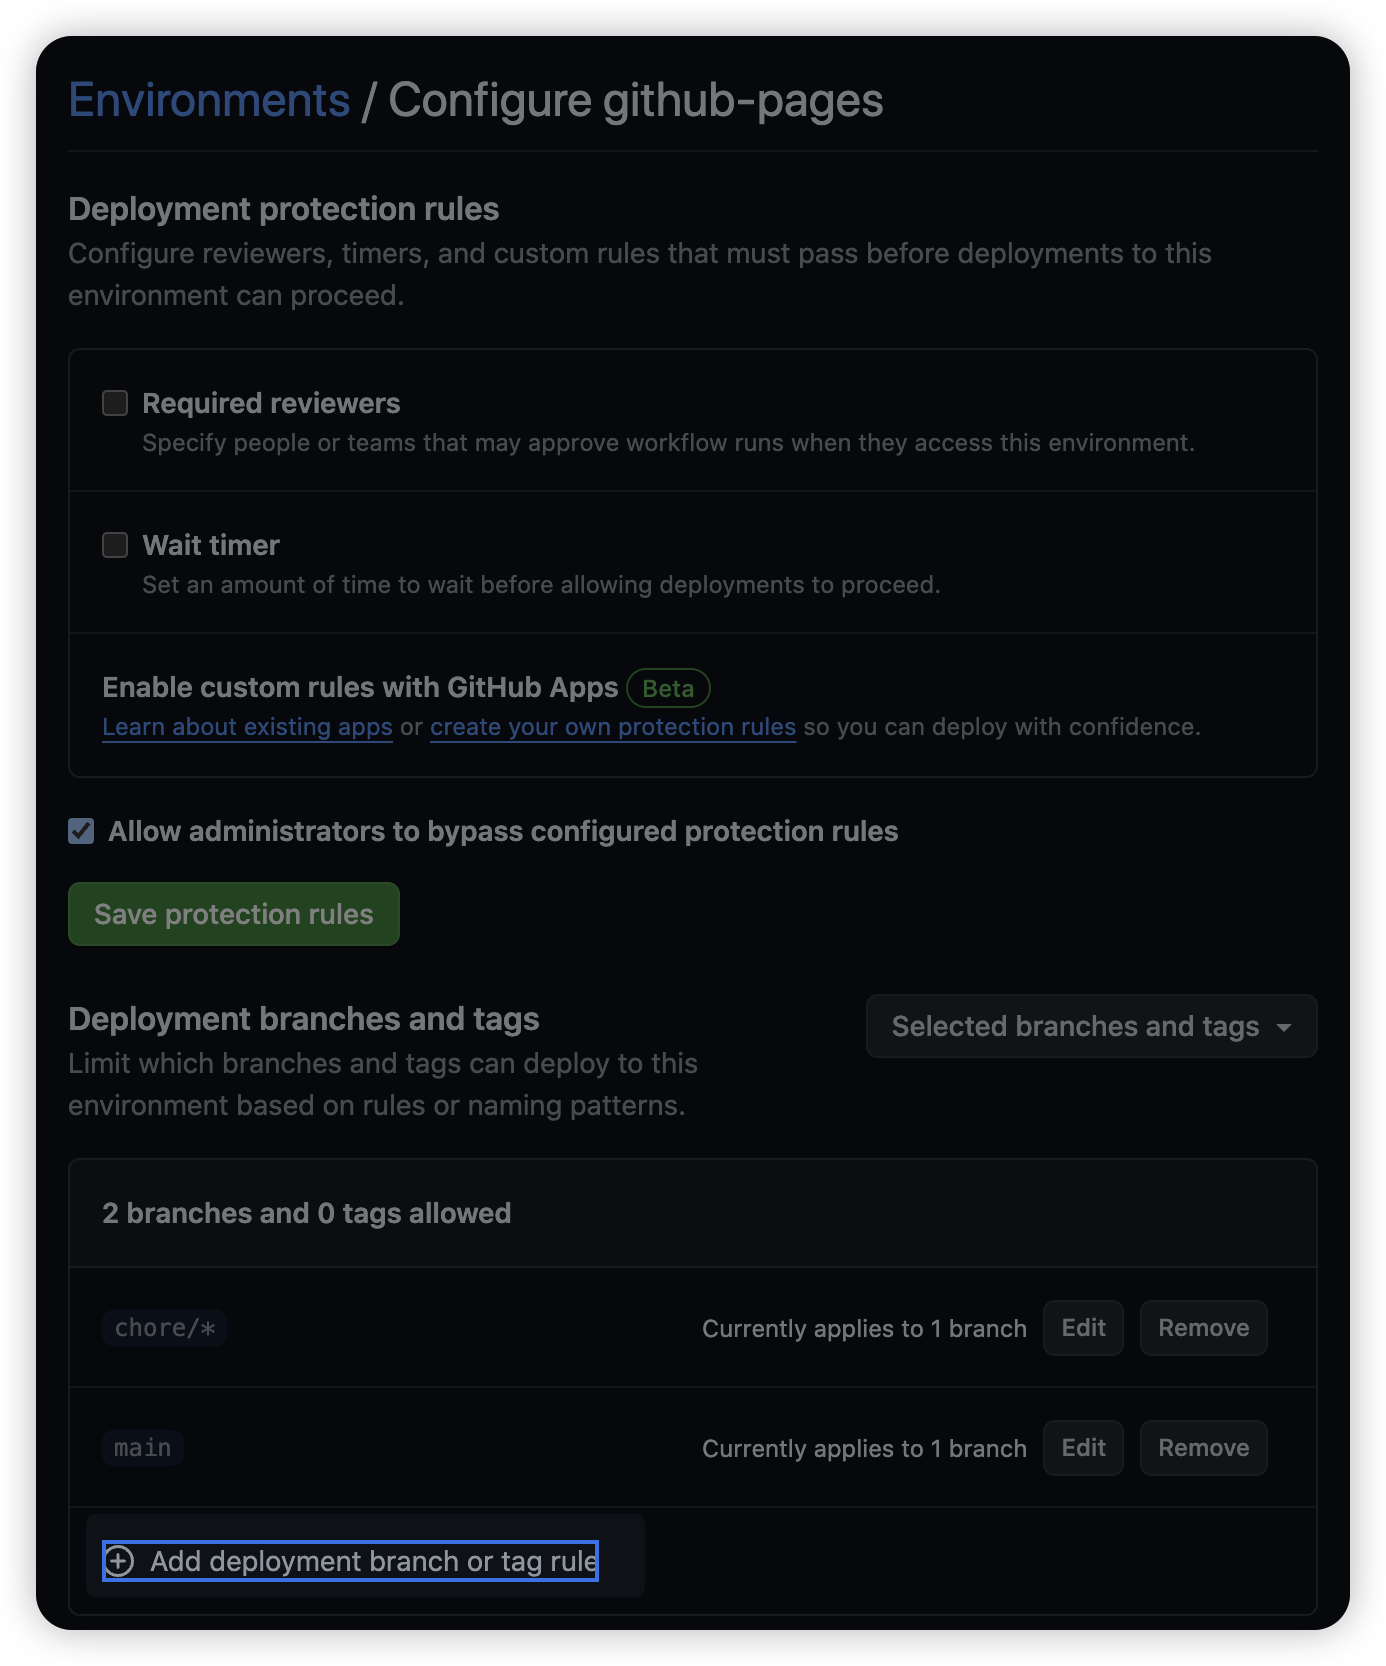
정규 표현식을 적용할 수 있는데, 여기서는 chore/ 로 시작하는 모든 브랜치에서 Github Actions 에서 작동하도록 설정해주었다.

그 다음 Github Actions yaml 파일에서 브랜치를 추가한다.
1
2
3
4
5
6
7
name: Spring Rest Docs

on:
  push:
    branches:
      - main
      - chore/spring-rest-docs-적용#102 // 추가한 브랜치
그러면 chore/spring-rest-docs-적용#102 브랜치에 push 이벤트가 발생하면 Github Actions 가 작동할 것이다.
참고자료
- RestDocs - include file not found [티스토리]
- 프로젝트에 Spring Rest Docs 적용하기 [velog]
- restful-notes-spring-hateoas [github]
- 에러 : JPA metamodel must not be empty! 해결기 [velog]
- @EnableJpaAuditing을 분리해야하는 이유 [티스토리]
- GitHub Actions 배포 동시성 설정 [github.io]
- Branch “master” is not allowed to deploy to github-pages due to environment protection rules. [velog]