
실행 환경
- OS : ubuntu 22.04 (AWS EC2)
- Python : 3.10.12
- Chrome : 120.0.6099.71
- ChromeDriver : 120.0.6099.71
문제 상황
- Ubuntu CLI 환경에서 chromedriver 와 selenium 을 이용해서 특정 사이트에서 클릭 이벤트를 수행하는 코드를 실행시키고 있었다.
- 어느 순간, 프로그램 실행 결과가 정상적으로 출력되지 않았는데, chromedriver 에 표시된 화면을 스크린샷으로 저장해보니 아래의 사진과 같았다.

- 스크린샷을 촬영하는 코드는 아래와 같다.
1
2
3
4
5
6
7
8
9
10
11
12
13
14
15
16
17
18
19
20
21
22
23
24
25
26
27
28
from selenium import webdriver
from selenium.webdriver.chrome.options import Options

class Automator:
    def __init__(
            self,
            login: str,
            password: str,
            app_url: str,
            use_chrome: bool = True,
    ):

        self.login = login
        self.password = password
        self.app_url = app_url
        self.__keys = dict()

        options = Options()
        options.headless = True

        if use_chrome:
            self.browser = webdriver.Chrome(options=options)
        else:
            self.browser = webdriver.Firefox(options=options)

        self.browser.maximize_window()
        self.browser.get(self.app_url)
        self.browser.get_screenshot_as_file("log.png") # 스크린샷 촬영

문제 원인
- CloudFlare 에서 headless 모드를 이용해서 접속하면 차단하는 기능 때문에 접속하고자 하는 사이트에 정상적으로 접근할 수 없는 것이 문제였다.
시행 착오
- 차단을 우회하는 방법을 적용하기 위해 아래와 같은 시행착오를 거쳤다.
- 결론부터 말하면
selenium_stealth라이브러리를 사용해서 문제를 해결했다.
크롬 최신 버전 업데이트
undetected_chromedriver 를 사용하려면 최신 버전의 chrome 이 필요해서 아래의 명령어를 실행해서 업그레이드 했다.
1
2
3
sudo apt-get update

sudo apt-get --only-upgrade install google-chrome-stable
그래도 여전히 동일한 오류가 발생한다.
undetected_chromedriver 사용
stackoverflow 에도 selenium 을 headless 모드로 이용할 때 cloudflare 가 접근을 막는 것을 우회하기 위한 질문이 올라와있었다. (링크: Selenium headless: How to bypass Cloudflare detection using Selenium [stackoverflow])
답변에서 undetected_chromedriver 를 사용하면 된다고 나와있어서 아래의 코드를 이용해서 시도해보았다.
1
2
3
4
5
6
7
8
9
import undetected_chromedriver as uc
from selenium import webdriver

options = webdriver.ChromeOptions()
options.headless = True
options.add_experimental_option("excludeSwitches", ["enable-automation"])
options.add_experimental_option('useAutomationExtension', False)

driver = uc.Chrome(options=options)
하지만 여전히 cloudflare 에게 차단을 당하고 있었다.
fake_useragent 사용
headless 모드를 사용하면 http headers 의 user-agent 에 HeadlessChrome 가 포함된다고 한다.
- 예시 :
Mozilla/5.0 (Windows NT 10.0; Win64; x64) AppleWebKit/537.36 (KHTML, like Gecko) HeadlessChrome/96.0.4664.110 Safari/537.36
HeadlessChrome 을 제거하기 위해 user-agent 를 랜덤으로 생성해주는 fake_useragent 라이브러리를 사용해보았다.
1
2
3
4
5
6
7
8
9
10
11
from fake_useragent import UserAgent
from selenium import webdriver

ua = UserAgent()
user_agent = ua.random

options = uc.ChromeOptions()
options.headless = True
options.add_argument(f'user-agent={user_agent}')

driver = uc.Chrome(options=options)
여전히 해결되지 않았다.
selenium_stealth 사용
위에서 소개한 stackoverflow 답변에서 selenium_stealth 라이브러리도 해결책으로 제시했는데, 이를 적용했더니 바로 해결되었다.
아래의 명령어를 실행해서 라이브러리를 설치한다.
1
pip install selenium-stealth
그 다음 아래와 같이 코드를 작성했다.
1
2
3
4
5
6
7
8
9
10
11
12
13
14
15
16
17
18
19
20
21
from selenium_stealth import stealth
from selenium import webdriver

options = webdriver.ChromeOptions()
options.add_argument("--headless")
options.add_experimental_option("excludeSwitches", ["enable-automation"])
options.add_experimental_option('useAutomationExtension', False)

if use_chrome:
    self.browser = webdriver.Chrome(options=options)
else:
    self.browser = webdriver.Firefox(options=options)

stealth(self.browser,
        languages=["en-US", "en"],
        vendor="Google Inc.",
        platform="Win32",
        webgl_vendor="Intel Inc.",
        renderer="Intel Iris OpenGL Engine",
        fix_hairline=True,
)
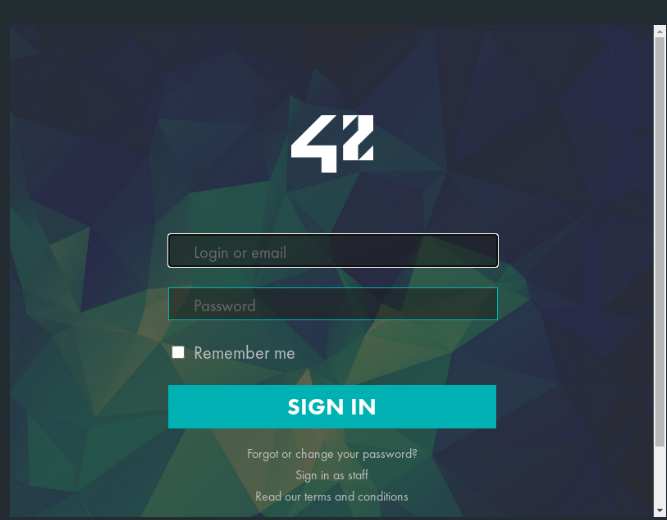
스크린샷을 확인하니 아래와 같이 정상적으로 작동했다.
문제 해결
selenium_stealth 라이브러리 사용이 문제 해결의 핵심이었다. 그리고 이 라이브러리를 이용할 때 chromedriver 를 종료하는 함수는 driver.close() 가 아니라 driver.quit() 으로 바꿔주어야 한다.
1
self.browser.quit() # chromedriver 종료